
Homemade Minas-Style Cheese Bread: A Traditional Recipe with Sour Cassava Starch
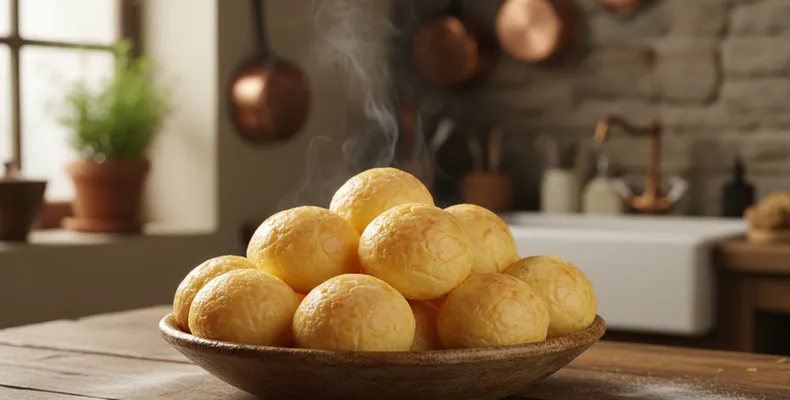
Few things capture the spirit of a table in Minas Gerais quite like a warm pão de queijo (Brazilian cheese bread), coming out of the oven with that aroma that fills the whole house. Crispy on the outside, soft and chewy on the inside, it's a guaranteed presence at breakfast, afternoon snacks, and even Sunday family gatherings. And the good news is that making homemade cheese bread is far simpler than most people imagine.
Pão de queijo has deep roots in Minas Gerais and is considered one of the greatest symbols of the state's cuisine. Its origin dates back to colonial times, when cassava starch (polvilho), extracted from manioc, was an abundant ingredient on the farms of Minas. Over time, and with the rise of the cheese produced in the region, this simple and brilliant combination was born—one that today wins over palates all across Brazil and around the world. Making cheese bread at home is, more than just preparing a snack, reclaiming a little piece of that heartfelt tradition passed down from generation to generation.
In this traditional recipe, the secret lies in the sour cassava starch (polvilho azedo), which gives it that characteristic texture and the slightly tangy flavor that sets a real Minas-style cheese bread apart. We'll go through each step calmly, including tips, substitutions, and storage methods, so you get it right on your very first try. Grab your apron and let's head to the kitchen together.
Recipe Overview
- Title: Homemade Minas-style cheese bread with sour cassava starch
- Origin: Brazil
- Region/tradition: Minas Gerais
- Category: Snack/savory
- Difficulty: medium
- Prep time: 1h
- Yield: about 30 small pieces
Ingredients
- 500 grams sour cassava starch (polvilho azedo)
- 250 milliliters milk
- 100 milliliters oil (or 100 grams butter)
- 2 eggs
- 200 grams grated meia-cura cheese or aged Minas cheese
- Salt to taste
If you prefer a milder flavor, you can mix part of the meia-cura cheese with parmesan. Measure everything out ahead of time, because this dough calls for speed at certain stages. It's worth investing in good-quality sour cassava starch, since it's responsible for the binding and the much-desired elasticity. The cheese also makes a big difference: the more flavorful and aged it is, the tastier the final result. A very fresh cheese releases a lot of water and can leave the dough too soft.
Instructions
- Place the sour cassava starch in a large bowl.
- In a saucepan, heat the milk together with the oil (or butter) and the salt until it comes to a boil.
- As soon as it boils, pour this hot mixture over the starch, stirring well with a spoon; this process is called scalding the starch and is essential for the correct texture. The dough will become lumpy and whitish, which is completely normal.
- Let the dough cool for a few minutes, until you can touch it with your hands without burning yourself.
- Add the eggs one at a time, kneading well between each addition.
- Add the grated cheese and keep kneading until you have a smooth, uniform dough that no longer sticks to your hands.
- If it's too dry, add a little milk; if it's too soft, add a bit more starch to get the right consistency.
- With lightly greased hands, roll balls about the size of a walnut and place them on a baking sheet, leaving space between them, since they'll grow in the oven.
- Bake in a preheated oven at 180 degrees Celsius (350°F) for about 25 to 30 minutes, or until golden and puffed.
- Avoid opening the oven during the first few minutes so the cheese breads don't deflate.
Tips and Variations
- If you can't find sour cassava starch, use a mixture of sour and sweet cassava starch in equal parts, but keep in mind that the characteristic flavor will be milder.
- Sweet cassava starch alone results in a smoother, less crispy cheese bread, with a texture different from the traditional one.
- Besides meia-cura, try aged canastra cheese, very typical of Minas, or combine it with a bit of prato cheese for those who like a softer version.
- Freeze the raw balls: once shaped, place them on a baking sheet and put them in the freezer; once firm, transfer them to a plastic bag.
- Bake only the amount you want, straight from the freezer without thawing, simply adding a few extra minutes to the baking time.
- Once baked, the cheese breads keep well for up to two days at room temperature, stored in a sealed container.
- To reheat, put them in the oven for a few minutes, avoiding the microwave, which tends to make them rubbery.
- Raw frozen balls last about three months in the freezer, keeping good quality.
- Roughly, each small piece has around 70 to 90 calories, varying according to the cheese and the amount of fat used.
More than just a snack, pão de queijo is a little piece of the heartfelt tradition of Minas Gerais, passed down from generation to generation. Make yours at home and let that aroma fill your kitchen.